A language to define AR Games
ARGDSL. Introduction.
This is a declarative, textual DSL that allows customising all aspects of an AR game, including the domain elements, their graphical representation, their behaviour and the game logic. The goal of ARGDSL is to avoid the need of programming or the use of complex AR frameworks, lowering the entry barrier to AR game development. Currently, we focus on physically realistic skill games (e.g., labyrinths, balance games, shooters)..
In this page, you will see a tutorial to create a new AR Game definition and post it to the server.
Install.
To install this project, you need Eclipse environment
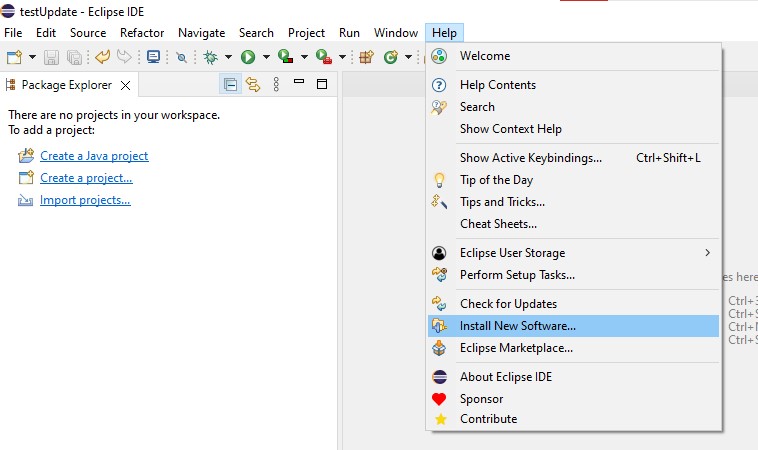
Then, in Eclipse, it will request a directory to store a workspace and work with it. Once you enter in a workspace, go to Help > Install new Software
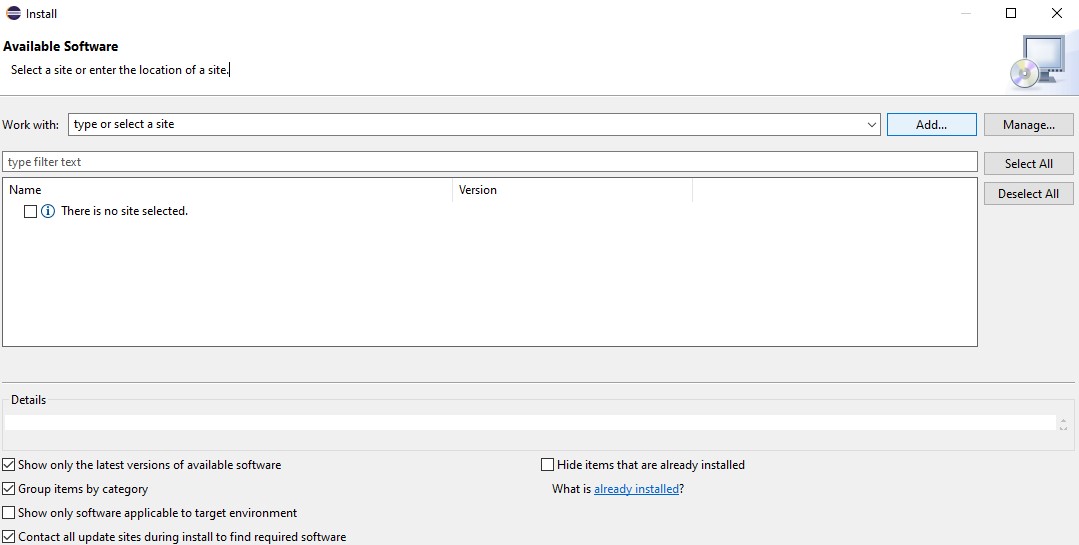
Install Software.
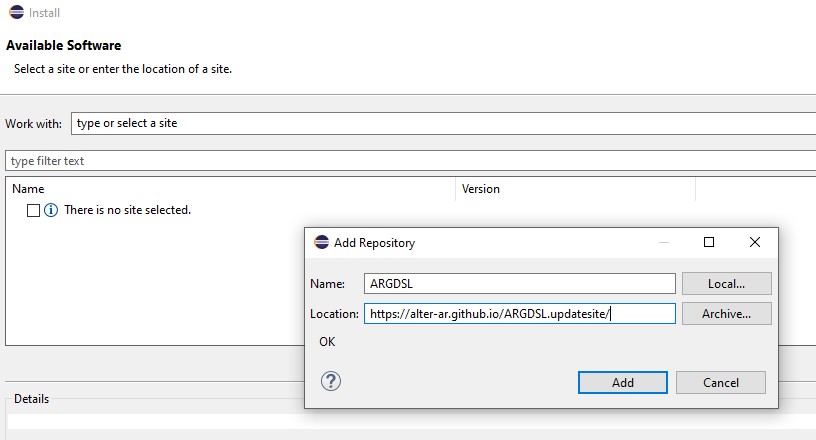
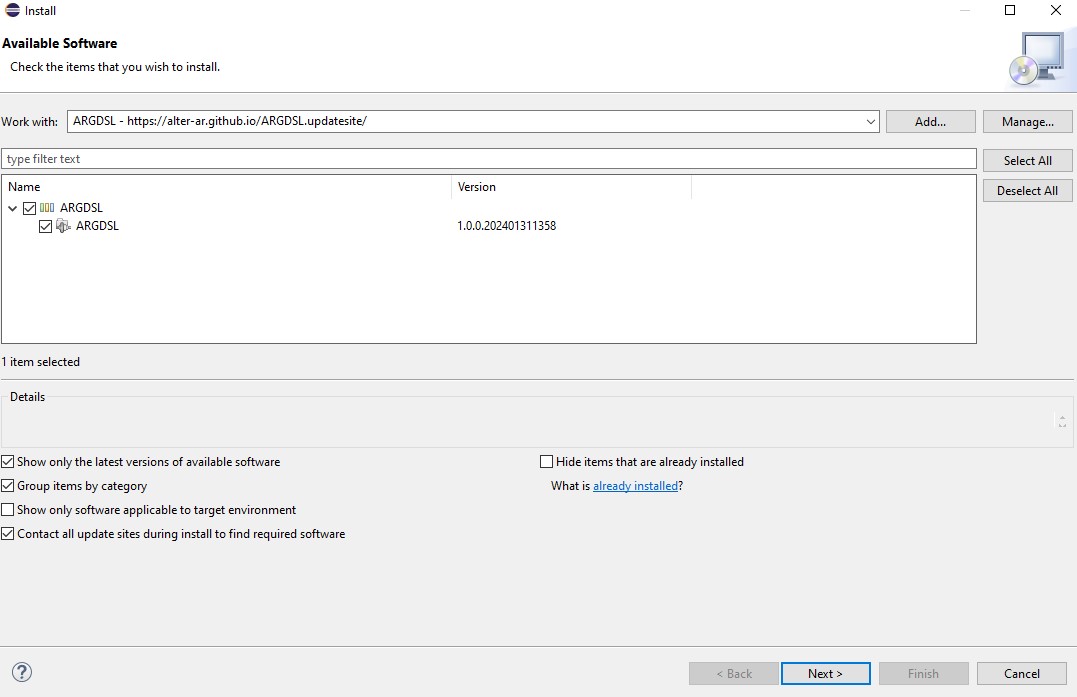
Once the window is prompted, click in the add button and in the next window put the following information, corresponding to a name and the URL of the updatesite > https://alter-ar.github.io/ARGDSL.updatesite/
Click add.
ARGDSL URL.
Then, select the feature (there is only one) and click in Next. Once is avaiable, click in finish and Eclipse will install ARGDSL.
Note: It will take some minutes to install, and once finished, Eclipse will request to restart the environment. It's necesary to make ARGDSL working.
ARGDSL install.
How to create a new game.
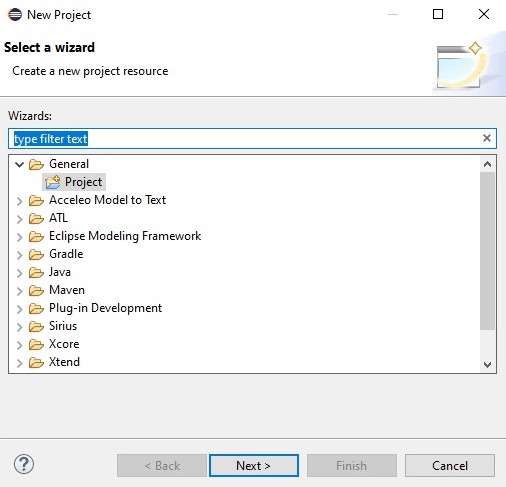
When the Eclipse runetime environment is working, create there a new project with File > New > Project . In the wizard selection use the general project and create it with a name on it
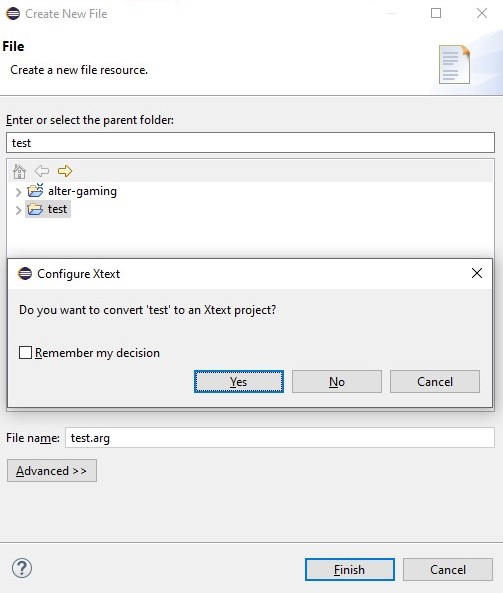
Once the project is created, right click to the project and create a file with New > File . The file extension must be .arg
If Eclipse suggest to transform it to an Xtext project, allow it
Create a project.
Create a game.
Edit the game.
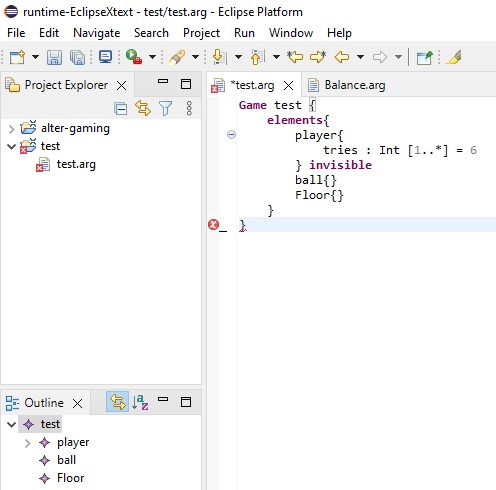
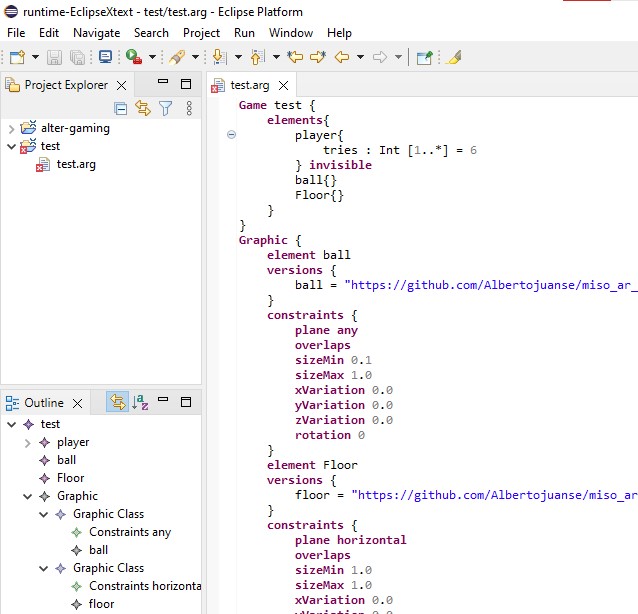
At first you will see an empty file. Using the inspector (Ctrl + Space) will appear the Game object, to make the Domain definition of the AR Game. This consist with a name of the Game, following with a list of the diferent elements avaiable in the game.
Each element is described by a name and attributes. These attributes are described with a name, following with type, cardinality and a default value. The attributes are optional, which in that case, the object must be empty.
Lastly, if you want an element to not be represented graphically, you can indicate it with a "Invisible" word behind the attributes.
Domain.
Next, we will configure the graphical representation. Outside the Game object in the same file, we put the Graphic object. Inside we indicate the element defined in the domain, following with the graphical versions and constraints.
The graphical versions consist in a pair with a name of the version and a valid URL of the 3D object. You can put as many pairs as you want.
The constraints goal is to edit the following features of the AR objects:
- plane: It allows configuring whether the AR object can be placed only on horizontal planes, only on vertical planes, on any kind of plane, or anywhere
- overlaps: It controls if the AR object can overlap other objects.
- sizemin and sizemax: It determines the initial, minimum and maximum size that the object can take during the game. If their value is 1.0, then the default size of the SCN object is applied
- xVariation, yVariation, zVariation: Are used to restrict the distance each object can be displaced from its original position
- rotation: It permits rotating the object horizontally
Graphic.
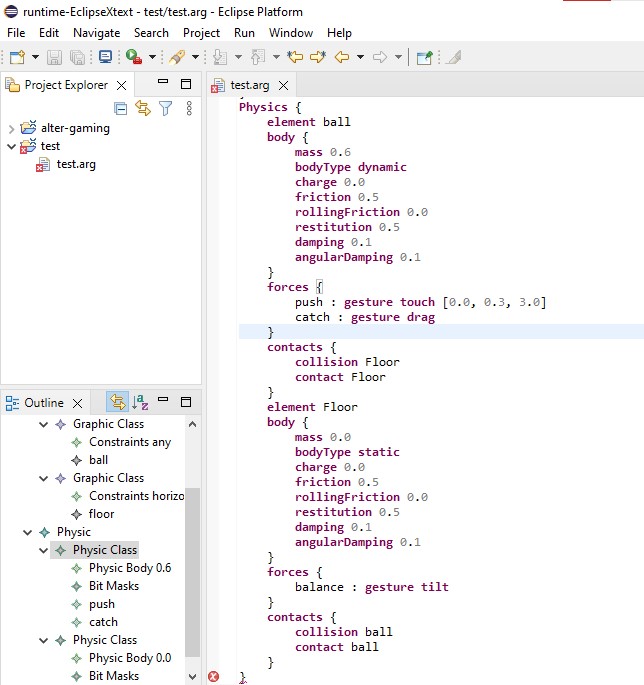
Now it goes the physics. Each element represented in the graphical representation should have physics with it. Each element has a physic body and may have some contacts and forces. Like the previous step, we define the physics with other object. Inside we put first the physic body, composed by:
- mass: In kg
- bodytype: Controls if the AR element is affected by forces (dynamic), not affected (static) or affected by forces with no gravity (kinematic).
- charge: Electric charge in culombs
- friction, rollingFriction: 0.0 (no friction) to 1.0 (full retain)
- restitution: How much energy lose at the rebound when there are contacts (force * restitution -> new force)
- damping, angularDamping: For the air resistance, same values like friction
Once you have the physic body, you may add some forces. The forces are defined with a name, the gesture (drag, tilt or touch) and a 3D vector of the force if needed (tilt and drag doesn't need a vector)
The conctacts are to indicate which elements will collide and/or contact. In ARGDSL is defined with collision followed by the elements names and the same with contact
Physic.
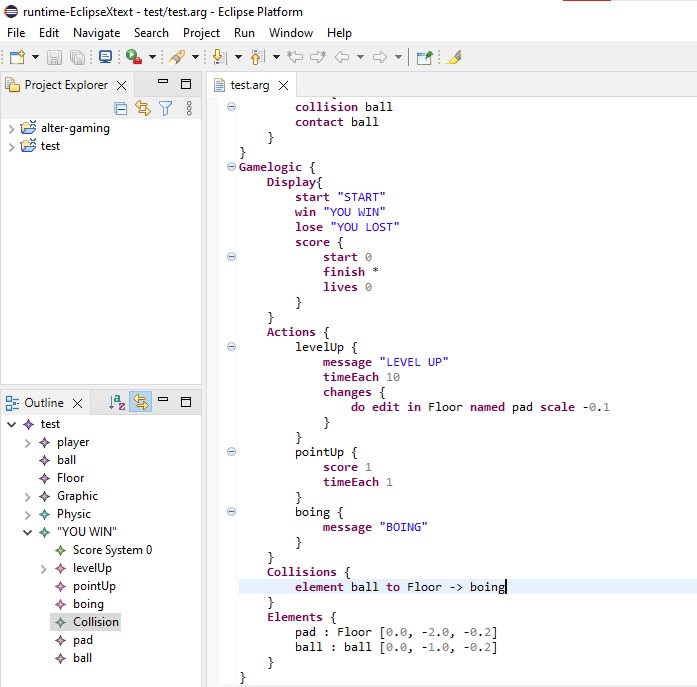
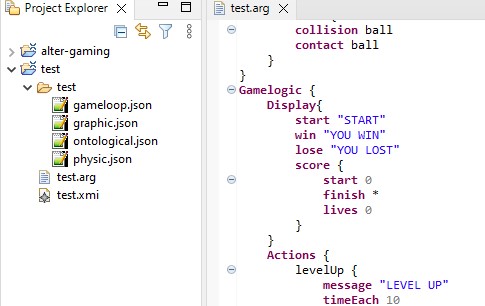
And last we have the AR Game logic, where all actions on the game, display and game controlers are defined. Below the Physics object, we put the Gamelogic object.
Inside, we start putting the Display: consists in the 3 messages of Start, Lose and Win, and the score information, where we put the start points, the finish points and the lives avaiable in the game.
Next we have the actions of the game. Each action performs one of four possible basic actions (start the game from scratch, lose, win, restart the game saving the progress), or none of them. In addition, it may display a message, change the score, self-trigger the action in a time interval of seconds.
This actions also can trigger some changes to the objects created of the game by creating or deleting objects, modifying attribute values, applying forces, or changing object positions. The actions can be triggered when an object meets some conditions, there is a collision or a button is pressed. To do this, looking at the example, the syntax is "do create/delete/edit in (object element name) named (object name)" and optional you can add: "scale Double force (force name) stat (attribute name) changeStat (Int)"
After this, we have the collisions controller, when we indicate the 2 collisions with the action trigger: element (element A name) to (element B name) -> (action name)
Then we have the buttons list, where we indicate with and object with a pair of name of the button and the action: "String -> (action name)"
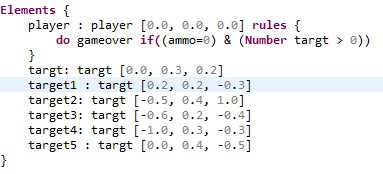
Last, we have a list of objects of the game at the start indicating the objects' name, class, position, and attribute values. Objects may have associated rules, to be triggered when some attribute condition is met. Conditions can be arithmetic or logical, and their operands can be constants, attribute values, and an operation to count the number of objects of a class. Rules syntax:" rules { do (action name) if(condition) }" The conditions is define with if like most languages like Java or C++
Game logic.
Rules.
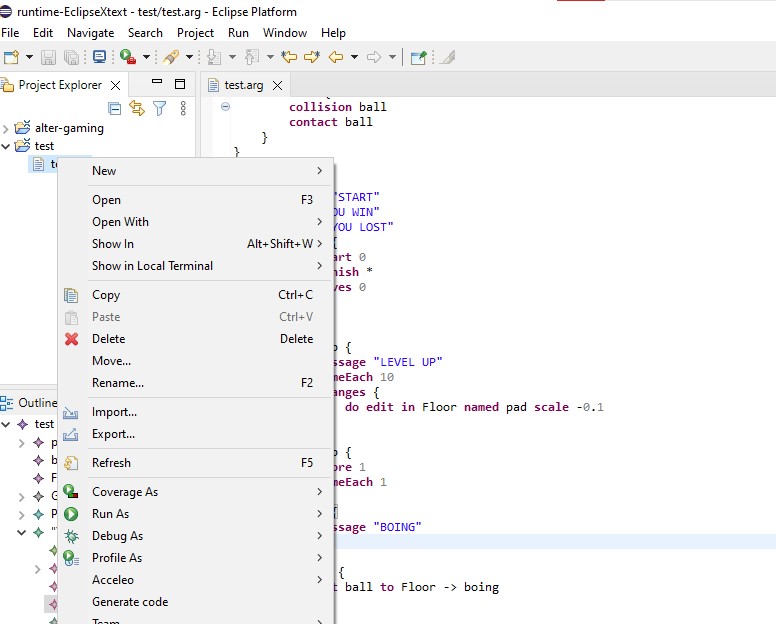
Generate code.
Once the AR game is finished, to generate code, right click to the .arg file and click the option generate code. Once the message is prompted, refresh the archive explorer (F5) and you will see the .xmi file, that is the model generated, and the 4 json files corresponding to the 4 parts of the game that we explained in the tutorial.
Generate code.
Generate code.
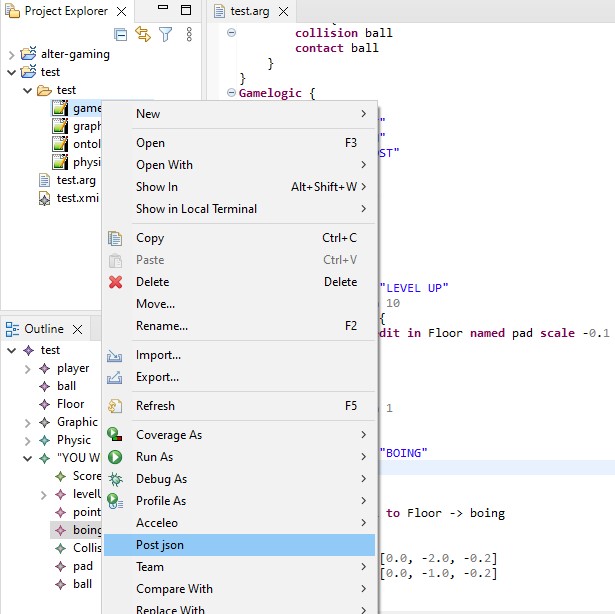
Post to server.
The last step is post the code to the server for the IOS client. To do it, just right click to the .json files and click the postJson option. The code is ready to play with the client, that in our case is ALTER-gaming.
Post code.